
While we are eagerly waiting for Mesh for Teams to take us to the Metaverse in Teams Meetings we can take advantage of various meeting features that are available in Microsoft Teams already today or soon. Some of these have not been that much announced out yet, but they do exists for people to start trying them out.
Microsoft Whiteboard updates
Before going to external sharing, let’s take a look at some other features:
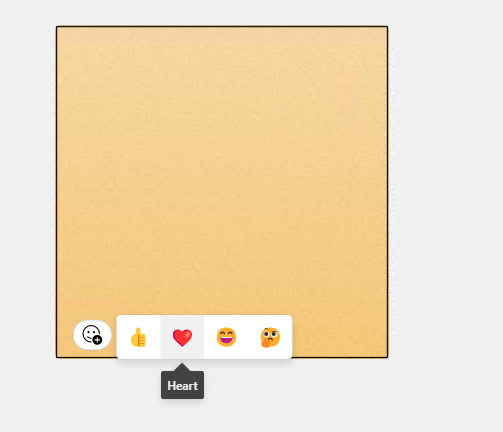
The one very useful one being that you can now vote Notes on the board. While a small change, it has a bit change when you think about ideation and brainstorming session.
You can also lock objects now.

As can be seen, locked object is not available for moving, editing, changing color or deleting. It gets locked to the background.


When object is locked, you can’t accidentally delete or adjust it.

You can also now copy-paste images to the board via clipboard.
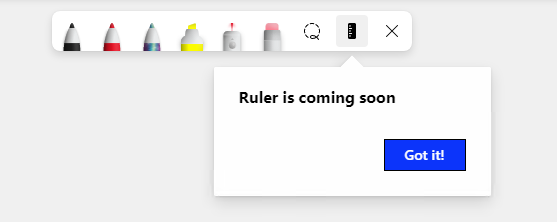
What is also visible already in the Whiteboard UI, but not active yet, are ruler and ability to add pictures to the Whiteboard with Bing search. When you click these you get a notification that these are upcoming features.

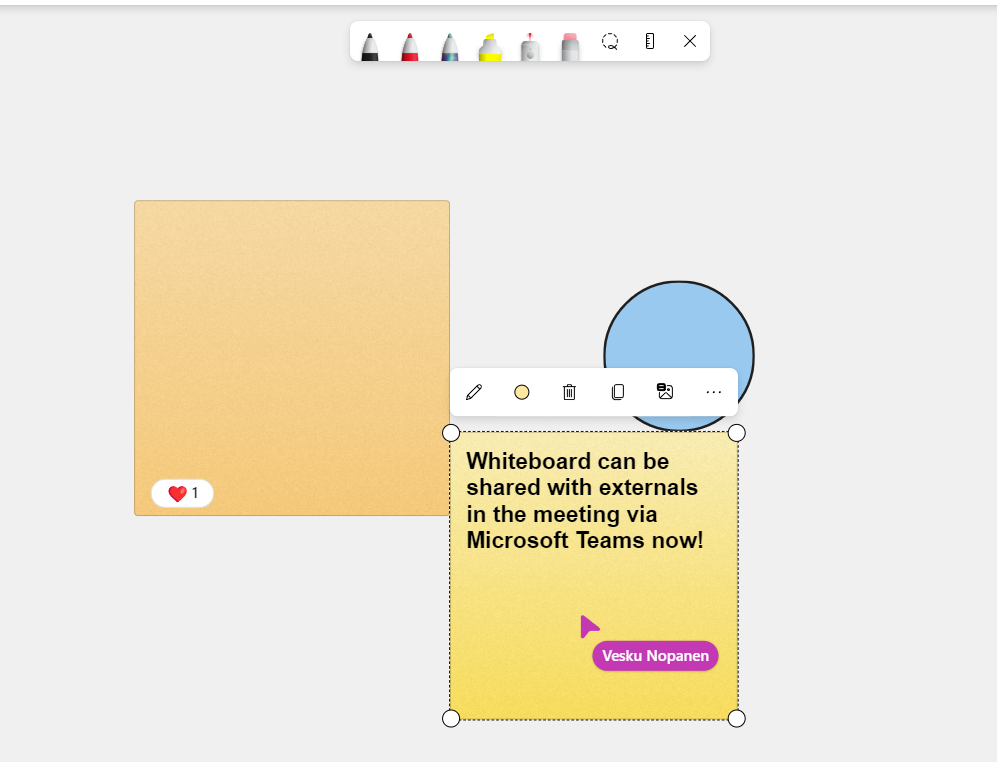
Whiteboard can be now shared with externals in Teams meeting!
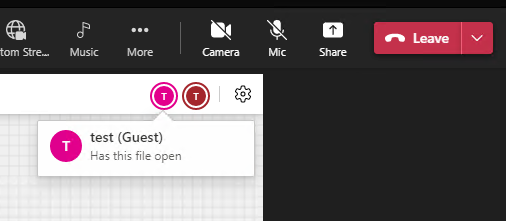
When external attendee joins Teams meeting they can work on the Whiteboard just like internal people. They can turn on collaborative cursors from Board settings (gear) to be able to see who is editing what.
The only exception that I found that is the voting on Notes: external participants can not (yet I presume) vote on notes but they see how internal people have voted. Voting works with external participants also.

Sharing a specific window or application on Windows 11
We have typically got used to share a specific window or application to Teams meeting via Teams share tray (start sharing, choose a window and so on). Earlier I actually avoided using it too much – one reason was that it was way easier for me to share one of my desktops (I had three monitors) instead a specific window. However during February I upgraded my home office by replacing two smaller Full HD monitors with one large 4K monitor. With this I had to start thinking about sharing more than before.
Sharing a window or application is also recommended when you are working on just a single screen. This way others in the meeting don’t see your whole desktop and you don’t accidentally show them your emails or Teams. So this is why it is important that sharing a window to a meeting is simple and easy to do.
Windows 11 users can do this very easily: When you are in a Microsoft Teams meeting you can share any window to the meeting using Windows 11 sharing feature. In this case I have a specific Edge browser selected (the one most on the right).

When you choose to share a window/app you get a confirmation message. The app you are sharing is also brought to your screen so you can see what you are going to share.

And that’s it! This is way easier than to go ahead and choose the right window out of Team’s list of windows if you have more than few applications open.
And when you need to switch to an another window / app? Just share it just like the first one.
Once you are done, you can also stop sharing via the same location.

Streaming your meeting / webinar to social directly from Teams without additional software
If you are a meeting organizer, you can now choose to stream your meeting directly to any target that supports RTMP. This includes YouTube, Facebook, LinkedIn, Twitter and other platforms.
You need to have LiveStreaming enabled for you by your Teams Administrator. Easiest way is to switch this on for global meeting policy in case most of people in your organization need this functionality. You can add the app to the meeting without LiveStreaming on, but you can not configure streaming keys nor start streaming.
You can use the following attribute within the Windows PowerShell Set-CsTeamsMeetingPolicy cmdlet to set up streaming. For more information on the cmdlet, see Set-CsTeamsMeetingPolicy.
Set LiveStreamingMode to Enabled to turn on streaming capabilities for one or more users.
In preparation for streaming you need to add Custom Streaming application to Teams meeting. This is done during the meeting using … menu and Add Application.

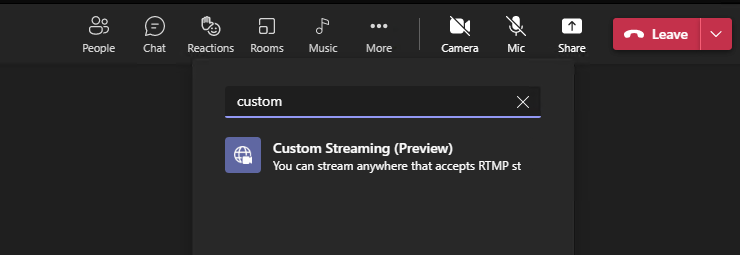


After a few clicks, seen in above snips, to add the application to the meeting you can define Streaming URL and key to your meeting. These are provided by the target you are streaming to. For example in YouTube you can find this information via YouTube Studio when you create a new Stream.

Let’s test this one with YouTube.

When you click Start Streaming (bottom right) your meeting will start streaming to the social. First you get a confirmation
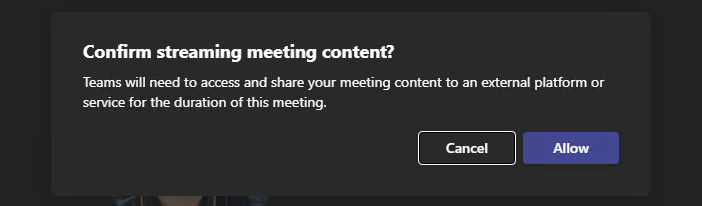

When others join the meeting they can see the same warning.

This looks like quite an early version still – it works nicely when you share your desktop or just want to create a videocast but not all Teams meeting features (for example PowerPoint Live) are not yet supported. You can also have only one streaming target but you can add the app multiple time for different targets. Only one is active at the time.
Read how to set this up from the Docs and how to use it from Support article.


If I share content, my video disappears so you need to think to what purposes you are using this option to. I think it is a great and easy way to start sharing to the social without having to add in additional tools or setup. That comes with limits, but for example with sharing content and having a conversation afterwards works really nice since Streaming switches between active speakers. (yes, the second camera feed isn’t good but that is due to my setup).

I think there are good usage for this feature already: making it possible to attend your webinar, announcement or public event easily via social media.
I am expecting that Streaming will improve over time and this is should be treated as a minimum viable product version – or first version.
Tune your Presenter Mode
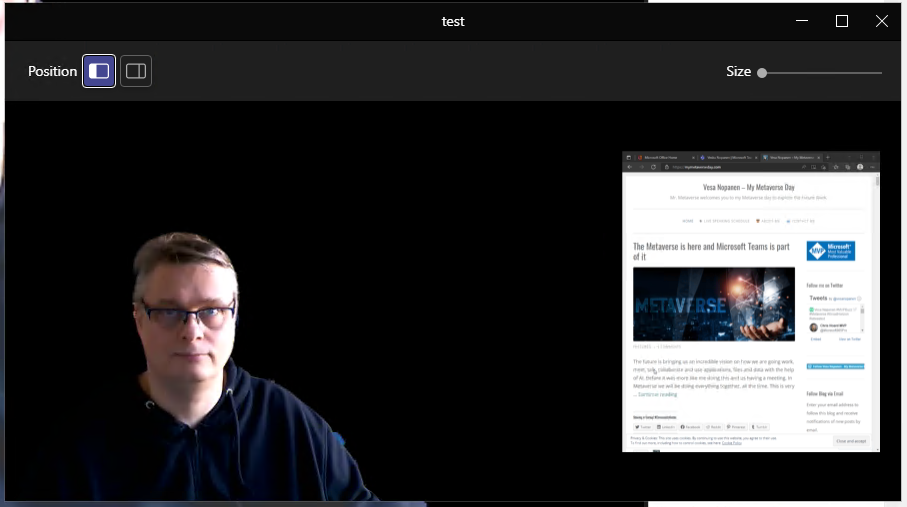
When sharing your window, desktop or PowerPoint using Presenter mode (overlaying your video on top of content) you can now fine-tune it by selecting are you on the left or right (default) part of the content. You can also adjust your video image size easily via preview screen.
The window I show in these pictures is the pop-up presenter gets to change and adjust the presenter mode. It is not visible to other meeting participants.


Adjusting Side-By-Side allows to emphasize video over content or content over video


Adjusting Reporter

And let’s not forget you can also change the background for Presenter Modes.


Co-Organizer helps to use several organizers for meetings
Once this feature is visible in your tenant (it is rolling out already and I was able to see it in my environment!) you can add up to 10 co-organizers to your meeting or webinar. Co-Organizers can “admit attendees waiting in the lobby, manage event options, create polls, control audio settings, share content, and spotlight attendees’ feeds throughout the event. In addition, co-organizers will be able to manage breakout rooms once they’ve been set up by the main organizer.“. The last part – managing breakout rooms – I haven’t seen in effect yet. I would, just to be sure, make sure people are Breakout Rooms admins by adding them that role separately with Breakout Rooms controls.
I have this one my demo tenant already. You can access setting co-organizer via Meeting options.


Embed your videos to PowerPoints you present via PowerPoint Live
This isn’t a new feature, but rather a best practice. When sharing a PowerPoint presentation to Teams meeting I have found out that I rather use PowerPoint Live than sharing my screen there. PowerPoint Live provides many great features like presenter view, inking, accessibility and slide translation. But it also makes it possible to share video to attendees without issues.
The trick is to embed your video file to the PowerPoint presentation: so your video is included in the presentation rather than linked. This way video is loaded and buffered to attendees directly instead going through via Teams meeting from your sharing to their end. Initiating the presentation will take a bit longer (depending on your video and their internet connectivity) but once it loads videos will play nicely.
It is good to remember that embedding a YouTube URL in your presentation doesn’t equal to embedding video file. If you want to present a specific video from YouTube then I would use a YouTube video downloader to get the file and embed it to presentation. Of course remember to provide a link to the original video for attendees and don’t forget credits and copyrights.
Casting from Teams desktop client to Microsoft Teams Rooms
What is really cool is that you can use Teams Casting to wirelessly display content from your Teams to Microsoft Teams Rooms. You can broadcast also your screen and cast content stored locally on your devices – or via Office 365.
This is also cool because this enables very ad hoc way for people, including those not invited to the meeting, to cast their content to Teams Rooms.

Speaker Coach for Teams should come available soon
This will help you to become a better presenter by giving you nudges or heads-ups if you are speaking too fast, interrupting someone and also reminds you to check in with your audience. Speaker coach is private and thus suggestions it points out are not visible to anyone else but you.
The roadmap for speaker coach is scheduled for April 2022 – so keep an eye on this one when it rolls out!

2 thoughts on “How to use Whiteboard external sharing and other new Microsoft Teams meeting features”