
There were cool announcements about Copilot for Microsoft 365 at Microsoft Build 2024 a few weeks ago. We heard about upcoming team level Team Copilots, how to create super-easily a light-weight Copilot out of selected files/folders from a SharePoint and Copilot Agents were also announced. The future looks interesting, but we still need to wait a bit for those Copilots – although it would be possible to build Assistants already since Assistants API is now in version V2. As a side note Assistants API is the tech making Copilot Agents possible, but while I have played a bit with Assistants API V1, I am going to wait for capabilities to come available in Copilot Studio until experimenting more with them.
It is June and I am constantly hitting a need to prioritize my time allocations, so first things first. And as Metaverse One 2024 Call for Speakers closing June 7th , I have the honor and responsibility of setting up a great conference to September 18th with my Metaverse One 2024 team! Stay tuned! But now, let’s get back to the Copilot plugins!
In this blog article, we are taking a look at an easy scenario in which we can use Copilot Chat in Microsoft Teams to retrieve information in a SharePoint list. It is a simple example but should help you to understand how plugins can be created and utilized. And since there are a lot of lists in SharePoint used worldwide there are also a lot of use cases for this. What is also good, is that these are well within the skills of junior citizen developers.
What I have in SharePoint is a list that holds incidents related to the operation of a time machine, set up in a Fallout universe. As you can guess, this is a purely fictional example (I least I hope so…) that I have used in my sessions when talking about Copilot and Teams.

And of course, I am curious to know what is happening with the time machine, without having to open the SharePoint list via a team or SharePoint. While this example is fictional, think what kind of information you have in your SharePoint lists. Instead of a list you might be using Dataverse tables or some other data sources.
- Build your flow with Power Automate
- Tell Copilot what your plugin does
- Wait..
- Use the plugin
- Conclusion

Build your flow with Power Automate
To connect your Copilot to a SharePoint list with a plugin, we create a flow in Power Automate. The easiest way to get started with this is to use Add action in Copilot Studio, when you have Copilot for Microsoft 365 selected.

From there, we select Flow, and you are taken to Power Automate to create the flow.
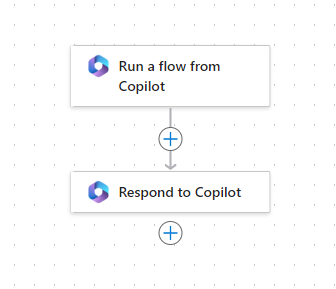
Note that you get Run a flow from Copilot as a trigger and Respond to Copilot at the end. Your logic is entered between these two points. Of course you can use Copilot to create a Copilot plugin, just tell Power Automate Copilot what you need, and you should be able to get a frame to work with. Power Automate Copilot has been improving all the time – and if you haven’t used Power Automate much it can help you get started. It is a good idea to try it, whenever you hit a blocker, or you need to start asking for information from the internet to process.

But don’t be surprised if you hit a message that it can’t help you.

Since this flow isn’t too complicated it was quick to set up without a Copilot assisting us. I (still) have high hopes that one day Copilot in Power Automate can build some of my flows quickly and without me needing to do (much) tweaking. Not today, but I have my sight set to the future.

As this is a simple example, I just create a table where information is returned in.


And when I respond to the table to Copilot, I have named the output parameter in a way that Copilot can understand what’s included in it. “List of issues in table”

I could also specify input parameters to the trigger, but to keep this simple “the first PoC” I go ahead with information retrieval.
Keep in mind that this is a flow you can create. You can add a lot of logic there, but I would try to refrain from making it too complicated as waiting times can grow longer. Remember that the user is waiting for Copilot’s response.
Then save and test the flow. Testing is important, as without it your flow might not appear to Copilot at all. And of course you need to test it before using it.
Tell Copilot what your plugin does
Unlike normally for Flows, while it would be healthy and good practice, you must give your flow a good name and description. A really good. Name and description defines what your flow does, and from these Copilot knows when to call it. The name and description must be clear enough, so Copilot knows when user’s prompt requests information returned by this flow. I would put the flow name a high priority, as using a prompt including the flow name seems to activate plugins more often.

My description might not be the most concise one, but I have found out that it is a good idea to tell more “catch phrases” and sometimes giving a few examples of user prompts are a good addition. Don’t try to write a novel, and just giving a list of keywords doesn’t work either. Try to describe the situation when the information returned by this flow is needed.
Then we just make sure our flow is saved, turned on and I would run one more test with that to see it works.
Wait..
Then you just need to wait until you can use the flow. Don’t try to add these in a hurry, because they don’t just appear there. I try to do these at minimum one to two days before I need them, to give infrastructure time to discover and attach the flow to Copilot plugins. It is also a good idea to run tests to your flow a few times, to make sure Copilot registers it.
One trick I have used is to create the skeletal flow with right in and out parameters tested as early as possible. This way the plugin registers for Copilot and I can work on the real logic meanwhile. This saves time when you want to move to the testing period.
Use the plugin
First, you need to select the flow to be activated as a plugin. You can find these Power Automate based flows when you open Copilot Chat in Teams and click on the plugins icon that is between clip and arrow on the bottom right corner.

From there, open Power Automate and make sure your flow is turned on. On default it isn’t, so click on toggle to activate it.

Now that we see the flow activated, we can test it out. How well Copilot can ”catch” your prompts and relay them to the flow, depends on how good your description is. Copilot plugins are still in quite an early stage, and it can be expected that you don’t always get it to fetch information via the flow. Also, the speed could be faster as it is looking for plugins but also trying to see if there are any other information sources that would match the prompt data.
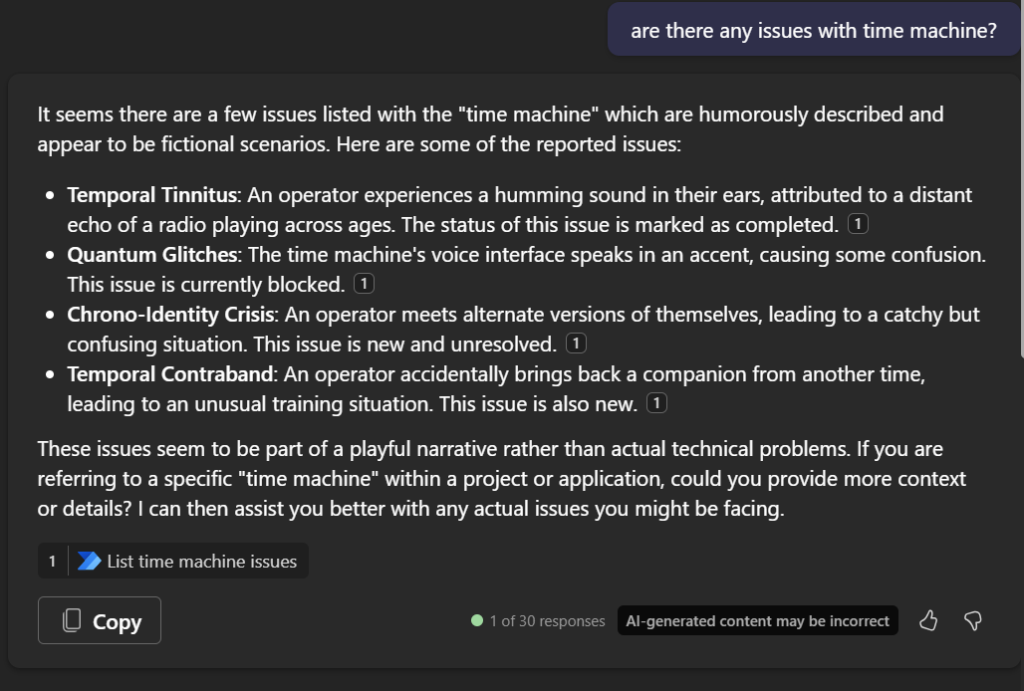
From the response, we can see Copilot references the flow we created: List time machine issues. Now we know it got the information from the list – although Copilot is a bit skeptical that we don’t have a real time machine…
Now Copilot knows the context of the conversation, so we can continue asking questions about the data.


This is but a fictional example, but what I love about large language AI models, is that they can make guesses and give ideas even on something like this. And it suggests follow up prompts you can easily just click on.

And you can always use Copilot’s natural skills to change the expectation you have from the it when you are asking for details.

And as we have the context, we can use Copilot to work with the information from the list.

Conclusion
Power Automate flow plugins are finally starting to work with Copilot for Microsoft 365. They are still in preview, and on their first steps. Depending on the prompt Copilot might not be able to use them every time, so use smart name and description for the plugin. Also, I recommend starting with information fetching as it seems to be the scenario that is supported the best.
But I recommend starting to test Power Automate flow plugins out as soon as possible. Discover what kind of information sources you have in SharePoint or in the Dataverse and create a simple PoC plugin and start collecting experiences when and how you can utilize Copilot.
In case you don’t see plugins at all, you might want to contact your Admin and ask if Copilot extensions are enabled or disabled in your environment.
Manage extensions for Copilot in Integrated Apps – Microsoft 365 admin | Microsoft Learn
What will you build as your first Copilot plugin?


One thought on “How to connect your Copilot to a SharePoint list with Copilot Studio and Power Automate”